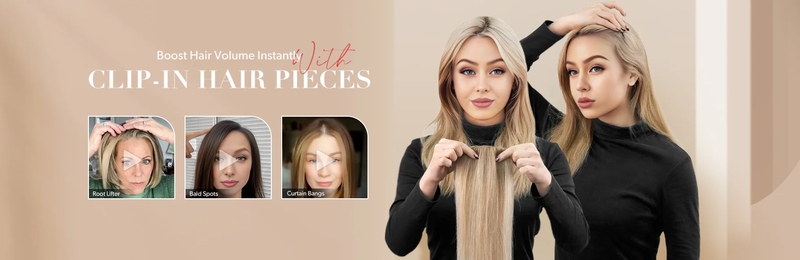
Hair pieces that clip in are quite revolutionary. They are a popular choice for anybody wishing to switch up their style without committing to a long-term look since they make it simple and quick to add volume and length to your hair. But if you want that flawless, natural finish, you have to know just how to attach and style them.This is the go-to tutorial for creating stunning clip-in hair pieces.
Now let’s explore the world of clip-in hair pieces. They’re really adaptable and, let’s be honest, rather helpful when you need to quickly improve the look of your hair. To get the seamless appearance, there is a little learning curve. Don’t worry; by following a few simple procedures, you may obtain a gorgeous, natural-looking appearance.
Getting Your Hair Ready
It’s important to prep your natural hair before you even begin applying the clip-ins. To get rid of any accumulation, start by cleaning and conditioning it. This guarantees that your hair is fresh and clean. Next, make sure your hair is completely dry. You may either air dry it or blow dry it, but before proceeding, make sure it is absolutely dry.
After your hair dries, divide it into sections. Partition your hair from the nape of your neck to the crown with a fine-tooth comb. Clip the upper sections out of the way. This makes it easier to apply your clip-in hair pieces evenly and securely. Linkhouse
Attaching Clip-In Hair Pieces
Although it may seem difficult, attaching clip-in hair pieces is actually rather simple. Here’s a short, detailed how-to:
- Open the Clips: To begin, release each and every clip on your hairpiece. Make sure each clip is open and prepared to be fastened if there are several.
- Positioning: Start the clip-in piece at the bottom of the part of hair that you want to work with. Work your way up from the bottom areas first. For the most natural effect, make sure the piece falls in line with your natural hairline.
- Fasten the Clips: To ensure that the clips stay in place, snap them shut. Comfort is key, so make sure they’re snug but not too tight. Make sure it’s secure by giving it a little twist once you’ve clipped it in.
- Blending: Now comes the fun part. Gently blend the clip-in hair pieces with your natural hair. Use your fingers or a comb to merge them seamlessly, making sure there are no visible lines or gaps.
Styling Techniques
With your clip-ins in place, it’s time to style them. Here are a few ideas:
- Curling: Want some bounce? Use a curling iron or wand to create curls or waves. This adds volume and gives a more natural, textured look.
- Straightening: Prefer a sleek look? Use a flat iron to straighten the clip-ins. Just make sure the iron is set to a safe temperature to avoid damage.
- Blending: To ensure everything blends perfectly, style your natural hair and clip-ins together. A light-hold hairspray can help keep everything in place and ensure your style lasts all day.
How to Care for Your Clip-In Hairpieces
Maintaining the finest possible appearance for your clip-in hair pieces requires proper upkeep. Here’s how to do it:
- Cleaning: To keep your clip-ins looking new, give them a frequent wash. To prevent tangling, use a shampoo and conditioner without sulfates and proceed with caution. Give it a good rinse.
- Drying: Place your clip-ins on a towel and let them air dry after washing. A blow dryer should not be used since it might be damaging. After it dries, lightly comb through to get rid of any knots.
- Storage: Keep your clip-ins somewhere dry and cold. A dedicated storage bag or box will keep them tangle-free and dust-free between uses.
Conclusion
Your hairdo can be drastically altered if you can learn how to apply and style clip-in hair pieces. You may obtain a magnificent yet natural look by correctly fastening the clip-ins, shaping them, and prepping your natural hair. So feel free to try out various looks and approaches. Your clip-in hair pieces will improve your appearance and give you more self-assurance with a little practice.